
Have you ever wondered how a simple sketch can transform into a chic design? It can feel a bit like trying to perfect that all-important outfit, you know, one detail at a time.
This guide lays out an easy, step-by-step process to help you translate your creative ideas into wearable art. We start with a basic croquis, which is just a fancy word for a quick sketch of a model, and then you build on it by adding those fine, stylish details that make all the difference.
Think of it like setting the stage for a standout ensemble. Each step builds on the last, gradually bolstering your confidence and letting you channel your inner trendsetter. So grab your pencil, let your imagination flow, and soon you'll be creating designs that are as unique as the runway itself.
How to Draw Fashion Designs: Step-by-Step Guide for Beginners
Begin by creating your own custom croquis. Grab a well-lit photo featuring a striking model pose and print it out. Place this photo by a window so you can gently trace the model's basic shape. Think of it like delicately lifting a veil – each curve captured forms a personal blueprint for your fashion ideas.
Next, lightly sketch the garment silhouette over your croquis. Use soft, free-flowing lines that let you easily adjust the design later. This is like setting the stage for a seamless outfit; you’re simply laying down the essential shape while saving room for refinements.
Then, move on to drawing in the critical details. With a fine pencil or pen, add seam lines, stitching, darts, and features like pockets and collars. Consider this part as outlining the building blocks of your masterpiece, where every stitch tells its own story.
After that, bring your design to life with a little depth. Use gentle shading, suggest fabric folds, and include movement lines to show how the garment drapes elegantly. A light touch here hints at volume and texture, complementing your initial sketch.
Finally, it’s time to add color. Whether you choose markers, gouache, digital tools like Tayasui Sketches, or even watercolors and colored pencils, let your creativity shine. This step is all about exploration, each color choice is a small victory on your journey toward mastering fashion design.
Essential Materials for Drawing Fashion Designs

If you're just starting out in fashion drawing, having the right tools can really boost your creativity. Try kicking things off with lightweight sketch paper that lets your croquis really shine. It's like working with a clear window where every detail of your gesture comes through, ever noticed how a good sheet makes your lines pop?
Next, a solid sketch pad is your go-to for final variations and precise presentations. Graphite pencils (think HB and 2B) help you outline your couture ideas with a gentle touch, while a kneaded eraser lets you fix any stray marks without erasing the design underneath.
For those intricate details, fine-liner pens ranging from 0.1 to 0.5 mm offer spot-on precision. And when you’re ready to experiment with color, alcohol-based markers or colored pencils are perfect for quick color studies. Gouache, mixed from just four primary hues, adds a playful artistic twist, enriching your sketches with a vibrant flair.
If digital art is more your style, give the Tayasui Sketches app a whirl on your tablet. Combined with resources like The Fashion Sketchpad, which features 420 figure templates, and a dedicated figure drawing book, this toolkit rounds out the essentials every beginner designer needs.
Figure Sketching Techniques and Croquis Creation for Fashion Designs
Start by printing a clear pose image and tacking it to a sunny window so you can trace the basic anatomy. This clever move gives you a personal guide that nails the right proportions for your design.
Next, try out head count methods such as 8-head or 10-head figures. These simple techniques let you fine-tune your sketches, whether you’re curating a sleek standing pose or capturing a lively action moment. Fun fact: using head count transforms a plain silhouette into standout art, just like a statement accessory turns an everyday outfit into something special.
Stick with one consistent croquis to speed up your design process and boost your confidence, as it helps you experiment with different body types and poses.
| Croquis Type | Description | Ideal Use |
|---|---|---|
| Straight Croquis | Vertical pose with balanced weight | Basic silhouette studies |
| Posed Croquis | Dynamic stance with bent limbs | Eveningwear and active designs |
| Custom Body Croquis | Adapted proportions (e.g., plus-size) | Inclusive design variations |
Stepwise Garment Rendering in Fashion Design Sketches

Step 1: Sketch the Silhouette
Start by drawing the outer shape on your croquis with clean, precise lines. Keep the proportions just right, and feel free to play around with digital tools. For example, create a freehand base layer and then overlay digital adjustments to better refine the silhouette.
Step 2: Outline Seams and Stitching
Next, trace neat seam lines, darts, and stitching details using a fine-liner pen or digital inking tool on a separate layer. This method lets you experiment with different seam placements without altering the original sketch. Try testing out various pocket positions digitally before finalizing the design.
Step 3: Add Fabric Folds and Movement Lines
Now, gently sketch soft folds at joints and around draped sections using light, fluid strokes. If you want to capture the natural movement of fabric, reference photos or digital simulation tools to see how materials behave. Think of it as layering subtle brush strokes to mimic the way satin cascades versus how denim holds a crisp fold.
Step 4: Incorporate Shading and Shadows
Add dimension by applying gentle shading, whether with pencils or digital gradient tools. Experiment with techniques like gradient fills or textured brushes to portray the fabric’s weight and texture realistically. For instance, gradually transition from light to dark to mirror the natural shadow on a curved garment edge.
Step 5: Finalize with Color and Texture
Bring your design to life with a splash of color. Use gouache, markers, or digital brushes to add vivid hues and custom textures that highlight each fabric type. For complex garments, layering different colors or textures can simulate material grain and intricate pleating, giving your sketch a rich, tactile feel.
Rendering Textures and Details in Fashion Design Drawings
When you want to add realistic texture, start by experimenting with gouache. Use a mix of four key colors to craft layers of opacity and highlights that transform a plain sketch into something vibrant and dynamic. Picture it like this: layering soft washes of translucent color, each one adding depth like the gentle creases in a luxurious silk gown.
Markers are fantastic for those bold, striking color blocks. Their quick-drying formula lets you create sharp lines and distinct areas that bring out design details, think of the clean edge of a collar or the crisp outline of a blazer. Try drawing a single marker stroke to define a pleat, and watch how it boosts the fabric’s character in an instant.
Watercolors bring a gentle, airy feel to your work, perfect for light materials and delicate accessories. Their fluidity can capture the soft sway of a chiffon dress effortlessly. For example, as you paint a light scarf, use sweeping washes that hint at movement and subtle texture. And don’t forget digital tools like Tayasui Sketches, which offer brush presets to mimic the effects of both markers and watercolors, blending tradition with modern technique.
Pay close attention to those small details, like intricate lace patterns or the fine grain of a fabric. These thoughtful touches can elevate a simple design into a real work of art, catching the eye with every careful, stylish stroke.
Practice Exercises and Portfolio Tips for Drawing Fashion Designs
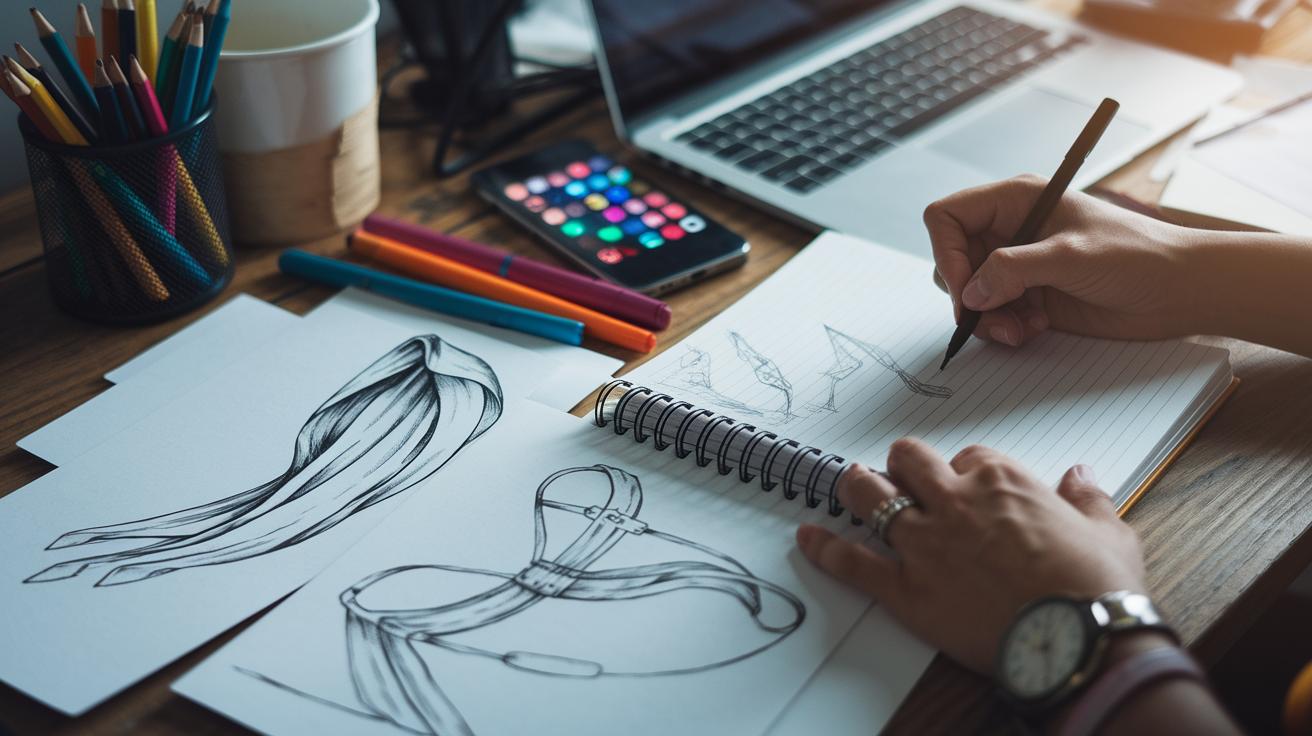
Ever tucked away sketches in a secret notebook? Many seasoned designers spend months refining their work privately before unveiling it to the world. One fun warm-up is a one-minute gesture study where you quickly sketch a flowing scarf or a standout accessory in just 60 seconds. It’s a playful way to loosen up your lines and boost your confidence.
Another cool exercise is a rapid doodle session focusing on details like belts and buckles. These quick sketches let you experiment and gradually carve out a style that’s truly yours. Try mixing in croquis variations to test out outfit ideas while keeping proportions in check. It’s a bit like trying different looks on the same model – each version has its own vibe.
On busy days, make use of The Fashion Sketchpad templates. They help you simplify drafting different figures and designs, turning everyday moments into creative sketches. Here are a few exercises you might enjoy:
| Exercise | Description |
|---|---|
| One-minute gesture sketches | Quick sketches to warm up and loosen your lines |
| Rapid accessory doodle sessions | Focus on small details like belts and buckles |
| Croquis variations | Experiment with outfit ideas while mastering proportions |
Start building your portfolio by gathering at least ten different looks, complete with front and back views and fabric swatches. This varied collection not only shows your growth but also sparks fresh ideas when you’re brainstorming your next design. And don’t forget to check out current runway trends for inspiration, the silhouettes and intricate styling details can light up your creativity. Consistent practice and a willingness to experiment will steadily sharpen your drawing skills in fashion design.
Final Words
In the action, we broke down creating stunning fashion sketches step by step. We explored constructing a croquis, drafting garment silhouettes, and perfecting details with shading and color. Clear guidance on materials and figure sketching techniques helped turn basic outlines into polished looks. Practice exercises and portfolio tips provided a real chance to build skills while staying creative. Keep experimenting and developing your style. After all, great creativity happens when you learn how to draw fashion designs for beginners with a little persistence and plenty of passion.
FAQ
Frequently Asked Questions
How to draw fashion designs for beginners step by step?
The process for drawing fashion designs for beginners starts by creating a custom croquis, sketching garment silhouettes, refining details like seams and folds, and finishing with shading and color. Practice is key.
How to draw fashion figures for beginners PDF?
A beginner PDF guide for drawing fashion figures typically explains creating a basic croquis with proper proportions, offering clear visuals and instructions to simplify the process for effective practice.
What fashion design sketches apps can help with drawing?
Fashion design sketches apps like Tayasui Sketches give you digital tools to simulate marker, watercolor, or gouache effects, making it easy and fun to experiment with and refine your fashion designs.
What are the 7 elements of fashion design?
The 7 elements of fashion design include color, texture, line, shape, form, pattern, and silhouette, each contributing to the overall aesthetic and functionality of a garment design.
What are common mistakes in fashion sketching?
Common mistakes in fashion sketching include overworking details, improper proportions, and missing garment movement. Focusing on basic croquis and simplified lines tends to streamline the design process.
Can I teach myself fashion design?
Self-teaching fashion design is possible through targeted guides, practice exercises, and online resources, which allow you to develop your drawing skills, experiment with media, and build a strong portfolio independently.
What are the 7 steps of sketching in fashion design?
The 7 sketching steps involve outlining the silhouette, marking seam details, adding folds, incorporating movement lines, applying shading, finalizing with color, and polishing textures to complete the design.